Sunday, January 31, 2010

Tutorial for Heart tart applique

Thought I should go ahead and post this tutorial , in case somebody wanted to try and make this dress before Valentines day. First, I wanted to say hi to all my new blog readers! and thank you for all the sweet comments you left me. It really means alot! Okay, first step to making the heart applique I created an outline heart on my embroidery software that was as big as my embroidery hoop.Then I randomly placed hearts within the heart outline. If anyone is wondering, the hearts I used were from www.emblibrary.com under princess hearts . It comes as a group, but I used my software editing tool to seperate each heart so I could place them one at a time. Once I had them placed, I changed the colors around. Colors that I used were baby pink, shrimp, maroon,hot pink and red.When I had my design ready, I then embroidered it out on a scrap piece of dark brown featherwale corduroy.I would suggest that you should embroider the outline heart with the same color as the dark brown corduroy(it will be easier to cover later with your satin stitching). 
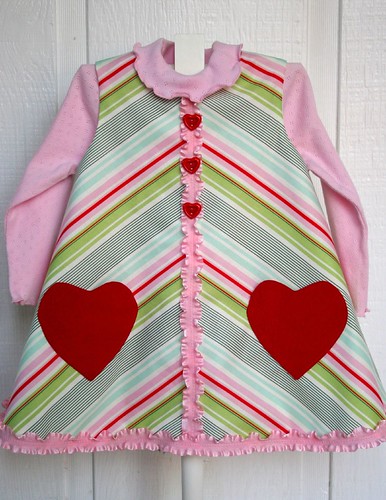
Here's what it should look like when you finish your embroidery.


Next, you will iron on an "iron-on adhesive" bond(I used HeatnBond Lite) to the back of your heart and then cut it out following the heart outline stitch.

Peel the paper backing away from the "iron-on adhesive".


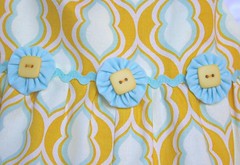
Using a temporary basting glue, start gluing your 3/8" rick-rack to the back side of the heart starting at the top center of the heart. Please don't use a regular fabric glue, cause that might hurt your machine when you sew through it.


After you have finished glueing, center your heart on your dress front pattern piece and fuse it with the iron. Put a piece of stitch and tear to the back side of your heart. Set your sewing machine to a satin stitch and start stitching around your heart. You want to cover your outline stitch but you don't want to cover the rick-rack.


Once you have finished your satin stitch, tear off the stitch and tear from the back and then you are ready to finish sewing your dress.
Hope this helps.Please let me know if you have any questions.

Friday, January 29, 2010

Heart tart dress


I have a subscription to Martha Stewart's Living magazine,but even if I didn't I probably would have bought this issue cause I loved the cover.I loved the cover so much that I created a dress that was inspired by it!

Monday, January 25, 2010

Valentine outfits ( I know, I shouldn't have done it)


Okay, I tried not to do it. But I love to make Valentine outfits. It's not very pratical to make Valentine outfits because it's a holiday that is for one day only, but...............The colors, the embroidery designs, and the cute Valentine prints. It was all calling my name, so I thought "what the heck, let's just have fun with it".

Monday, January 18, 2010

I did it!

" Kyoko" pattern by Modkid. Loved this pattern. The sleeves were very easy to put in and I like using the bias trim to finish my edges. I can see all kind of variations with this pattern design.
"Jordan" pattern by Bonnie Blue Designs. I was really surprised at how well I like this pattern. It's simple but it's a little different from an ordinary A-line jumper. Lots of design possibilities. and I don't know about you, but I would wear something like this.

Yep, I have used up all my "Nicey Jane" fabrics. I was so tempted to move on but I didn't.

Sunday, January 17, 2010

Tutorial for Jacob playsuit (shorter lining)

Here is my first ever tutorial blog! This was the reason why I wanted to start a blog in the first place so I can explain some of the shortcuts I make on my sample garments. Jacob's playsuit is a boys fully lined romper that I have used here to make up in a girly version. I thought that it was not necessary to line the entire playsuit so here is where I am going to explain what and how I shortened the lining.
1. Take your back lining pattern piece and lay on top of your front yoke pattern piece, matching up the side seam where the arm starts.


2. Draw a line on your back lining pattern piece following the front yoke pattern piece.


3. Pin your back lining pattern piece and cut the top portion of your pattern out and stop where you have drawn your line, clip both sides where your line is.


4. Fold back your bottom half of your lining piece and with your ruler, match up where you made your small clips and cut the bottom half.


5. Cut out your front yoke. Begin sewing your romper like the pattern has you do.


6. After you have followed step 19, and turned your facing to the inside, finish the bottom edge of you lining by serging, zig-zagging, or turning under the raw edges. On the outside of your playsuit , following your side seam, "stitch in the ditch" and stop at the bottom of your top front piece.You do this so that your lining does not flop out while the child is wearing it.


Here is a picture of what the shortened lining will look like when you finish. Now you will just follow the pattern to finish. I used a cuff to finish the hem of mine but you could just turn up the raw edges.
That's it! Hope this helps.


Thursday, January 14, 2010

For the Love of "Nicey Jane" fabrics

Okay, if you cannot tell yet, I love the "Nicey Jane" fabric collection. As always, Heather Bailey has done an excellent job designing these delightful fabrics. When it arrived in the shop I just went ahead and bought at least a yard of each print so that I could go ahead and plan out what I wanted to make. This is awful to say, but I could not wait for Christmas to pass so that I could start working on these fabrics. My goal is to use everybit of my Nicey Jane fabrics before I move on to my other projects.This way, I can use them for the front store window display .Outfits made up from the same fabric group usually make for a nice window display. This dress was made using the "Charlotte" pattern by The Children's Corner. I've wanted to do something like this for awhile with stripes and I am very pleased with how it turned out. I'm going to have to experiment some more later cause I think it could be really fun to see what kind of different effects you can create . This is "Baby Annie" pattern by Primrose Lane. I tried something a little different on the pant cuff by using rick-rack to make the gathered look. I did not use the elastic like the pattern has you do.


"Playdate Dress" pattern by Oliver+S. Some more of my experimenting. The idea for the flying butterflies came from an outfit I saw that used bee buttons instead. It was so cute and such a simple idea that I just had to try it. Loved how it turned out on this dress.This is not the last time you will see this idea!

"Flouncy Tops & Pants" by Indygo Junction. Those pants are fabulous! I can't wait to see what they look like on a little one.


"Claire" pattern by Portabellopixie. I adapted the pattern for long sleeves by using a tutorial from "The Handmade Dress" blog. It's very easy to do.The ruffled apron is something I came up with on my own.( I like ruffles)I know, I need to do some tutorials to show how I've done some of these adaptions. That's it for now! Enjoy!


Monday, January 11, 2010

Yo-yo trim


Yo-yo trim
Originally uploaded by iveyc95
Just tryin to figure out how all this blogging works. Cool, I figured out how to post pictures from my Flickr page.Here's a more detailed picture of the yoke on the Baby Annie outfit I just made. Love the colors in this print.

Sunday, January 10, 2010

Photo session with Lily


I slept in late(which is not unusual). Sharon called me and told me that she had Lily and I could come over to take the picture for our upcoming ad. When I got there, she already had the dress on,my mouth dropped. It was so cute on her! It's funny, no matter how many little outfits I make it still surprises me just how cute it looks like on.Here's some of the pictures from our photo session.We had to include Sandy(the cute white dog).I usually don't take pictures inside but it was way to cold to take them outside, so the pictures are not the best.Hopefully the ad people will know how to make it look good.

Friday, January 8, 2010

Hello World!

Thought I would never be doing this( Blogging). Makes me a little nervous cause I'm just putting my thoughts out there for anybody to read. Who knows, maybe I'll get into it. I have a Flickr gallery that I keep up with pretty well and I remember when I started it I was really nervous,like I'm feeling right now.Sooooooooooo, here goes nothing!